How To Setup Your cPanel Email in Gmail
Do you like using Gmail but have an email like yourname@yourdomain.com from your cPanel hosting? You can connect it to Gmail easily!
This means:
Your cPanel emails will come straight to your Gmail inbox You can also send emails from Gmail using your domain email (not just your Gmail address)
Just follow this easy guide to set it up!
STEP 1: Collect your data!
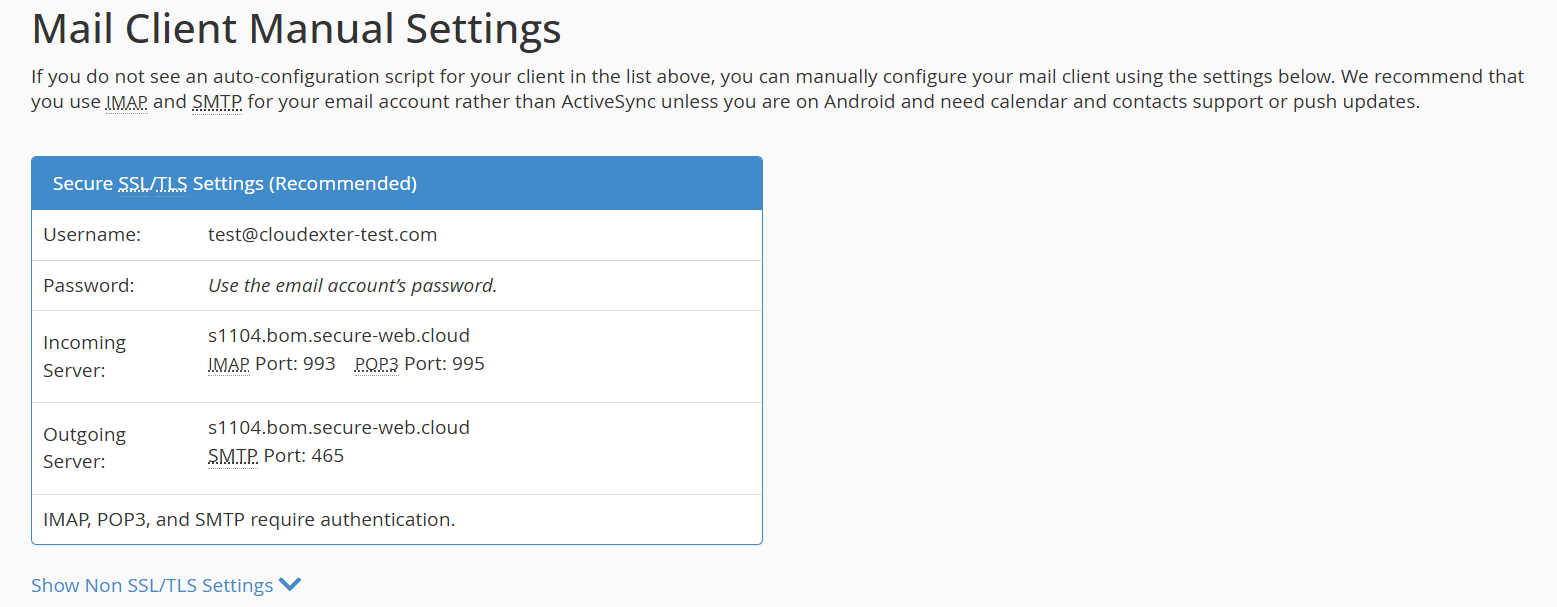
Section titled “STEP 1: Collect your data!”Make sure you have your cPanel email password and incoming and outgoing mail server settings! Usually you can use mail.your-domain.com for both incoming and outgoing. You can see this information quickly by logging into cPanel, click on Email Accounts and then ‘Connect Devices’.
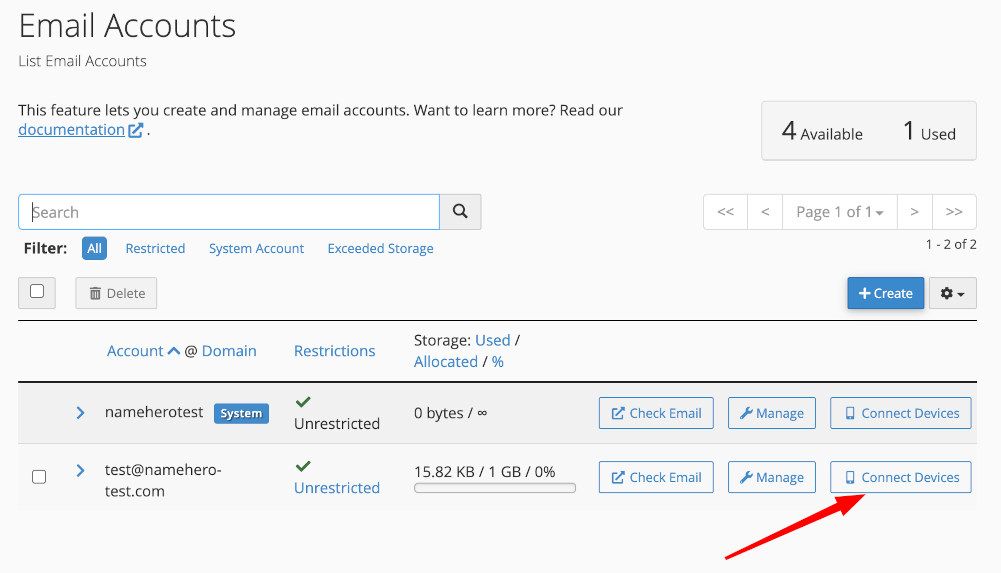
You will find this information here!
STEP 2: Login to your Gmail account.
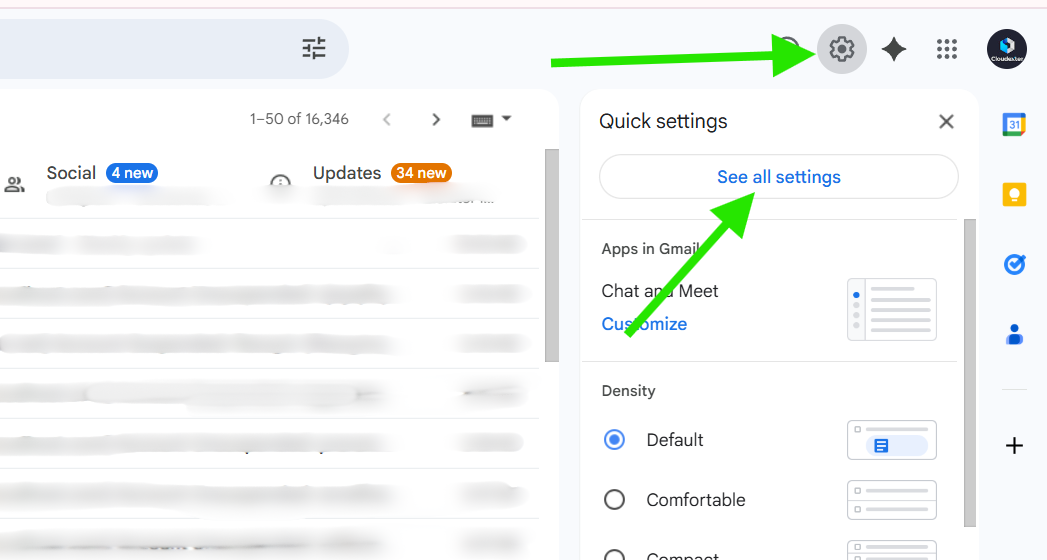
Section titled “STEP 2: Login to your Gmail account.”Log in to Gmail, click the gear icon (⚙️). at the top right, and select “See all settings.”
STEP 3: Find Accounts and Import Option.
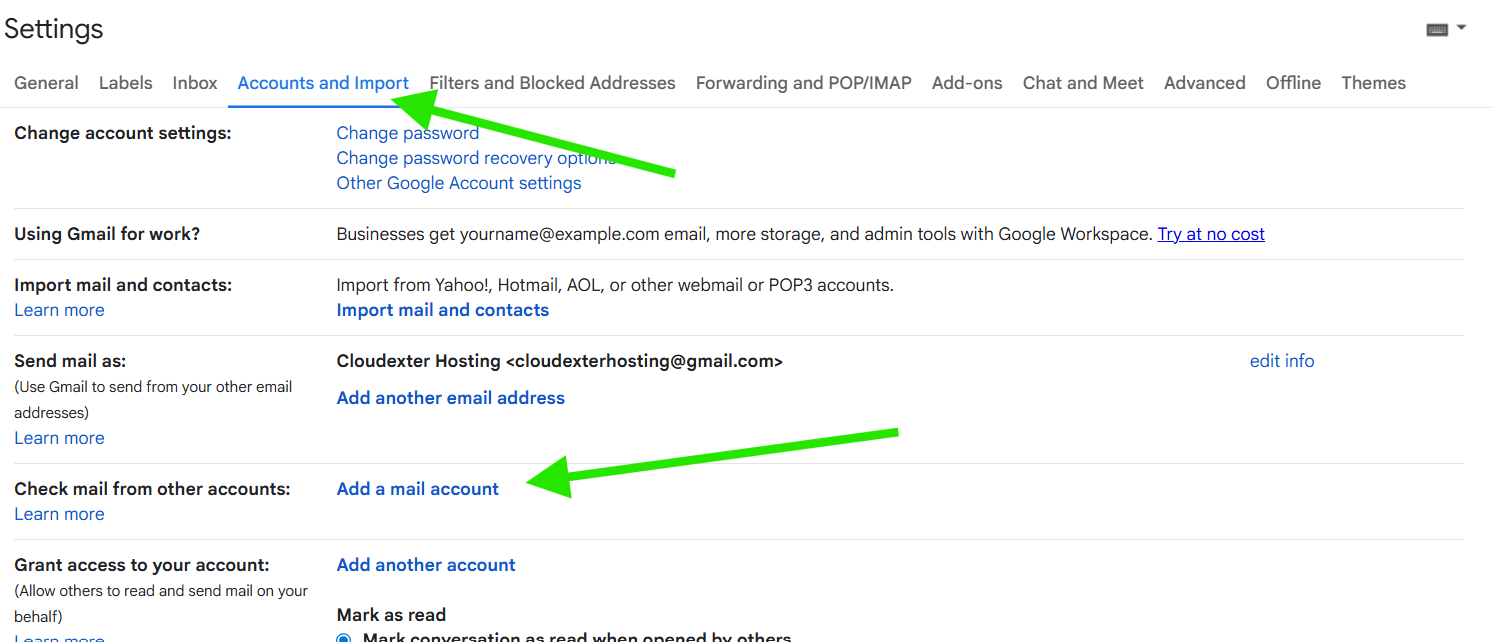
Section titled “STEP 3: Find Accounts and Import Option.”Click on the “Accounts and Import” tab at the top, then scroll down and click “Add a mail account.”
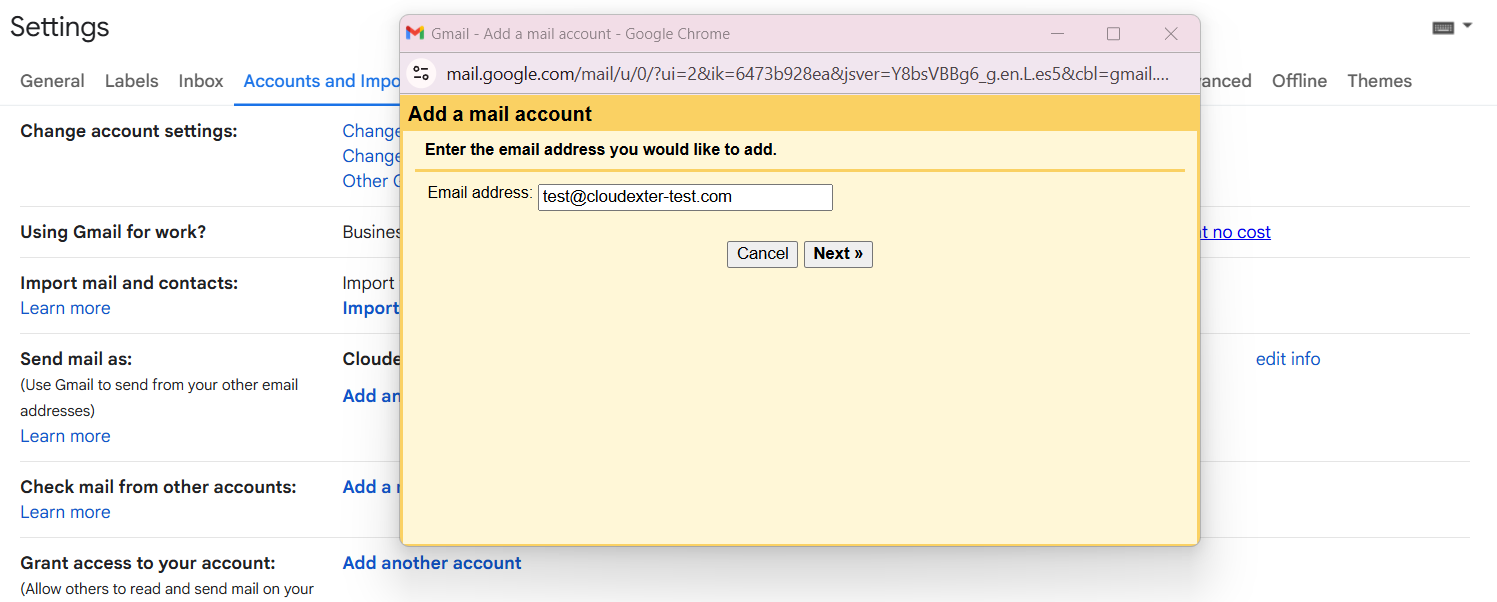
Step 4: Add a mail account
Section titled “Step 4: Add a mail account”A popup will appear, enter your cPanel email address and click Next to continue.
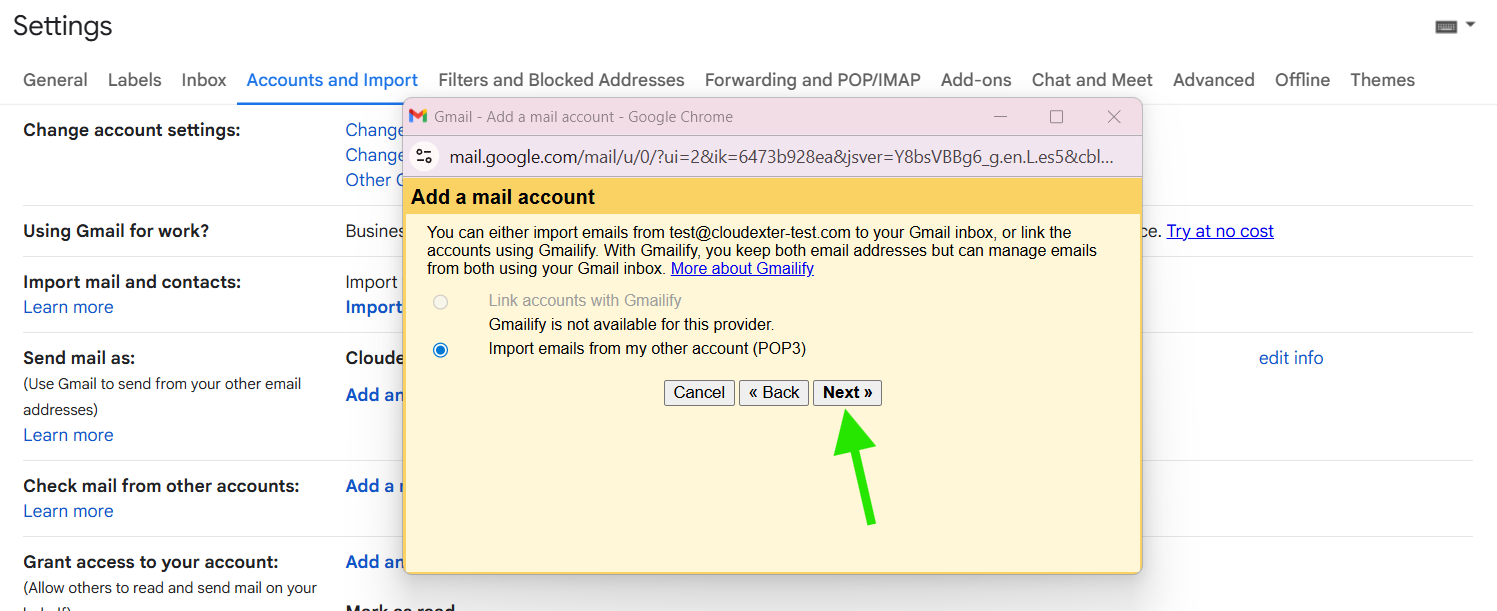
Step 5: click Next
Section titled “Step 5: click Next”Leave the option as it is, then click Next.
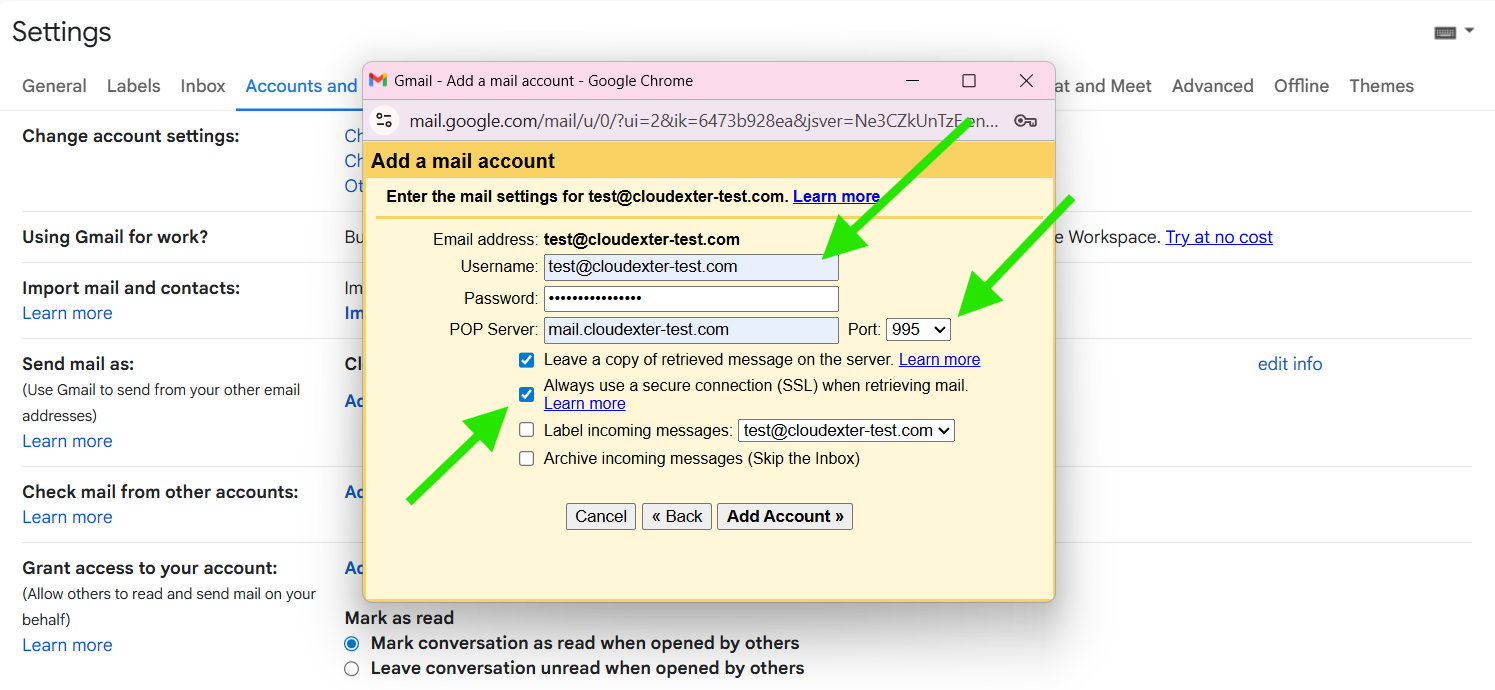
Step 6: Configure Email Settings in Gmail
Section titled “Step 6: Configure Email Settings in Gmail”Enter your full email address as the username, your cPanel email password, and use mail.your-domain.com as the POP server with port 995; check “Always use a secure connection (SSL)”, then click Add Account.
Choosing to leave a copy of the message on the server is optional, but it’s a good idea if you plan to check this email on other devices. You can also add a custom label to help organize and easily spot emails from your cPanel account in Gmail.
STEP 7: Click Next.
Section titled “STEP 7: Click Next.”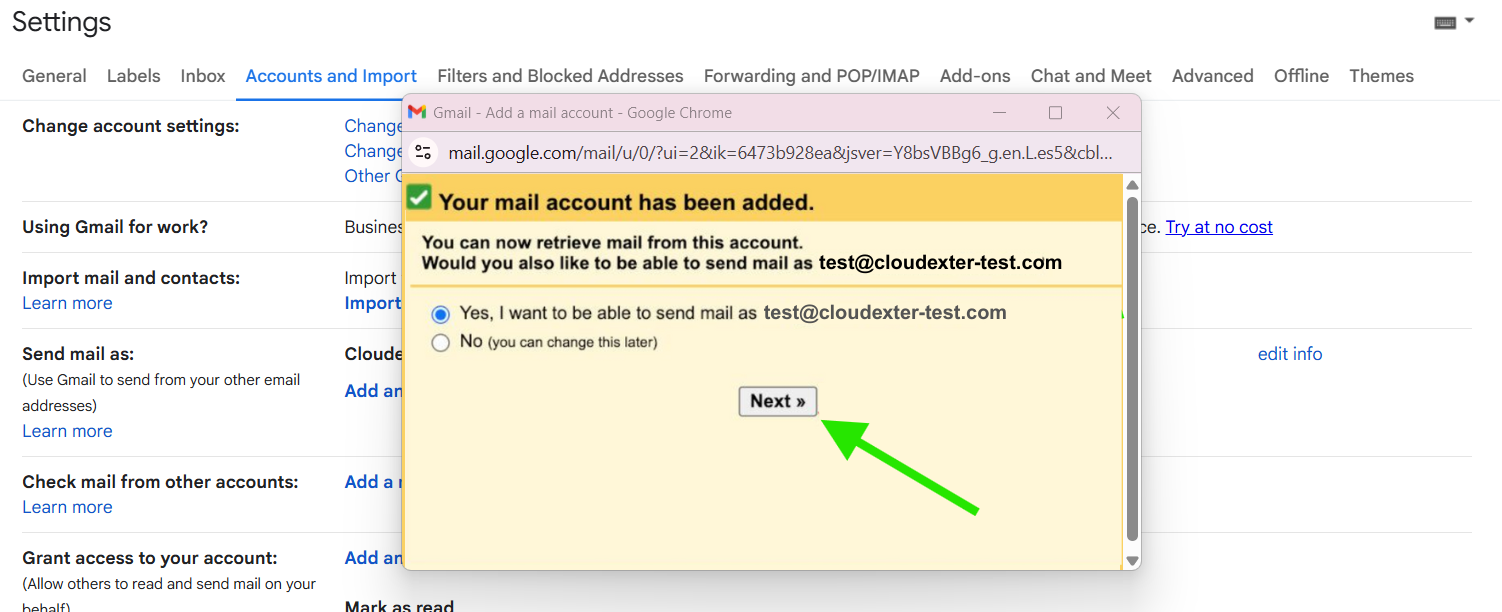
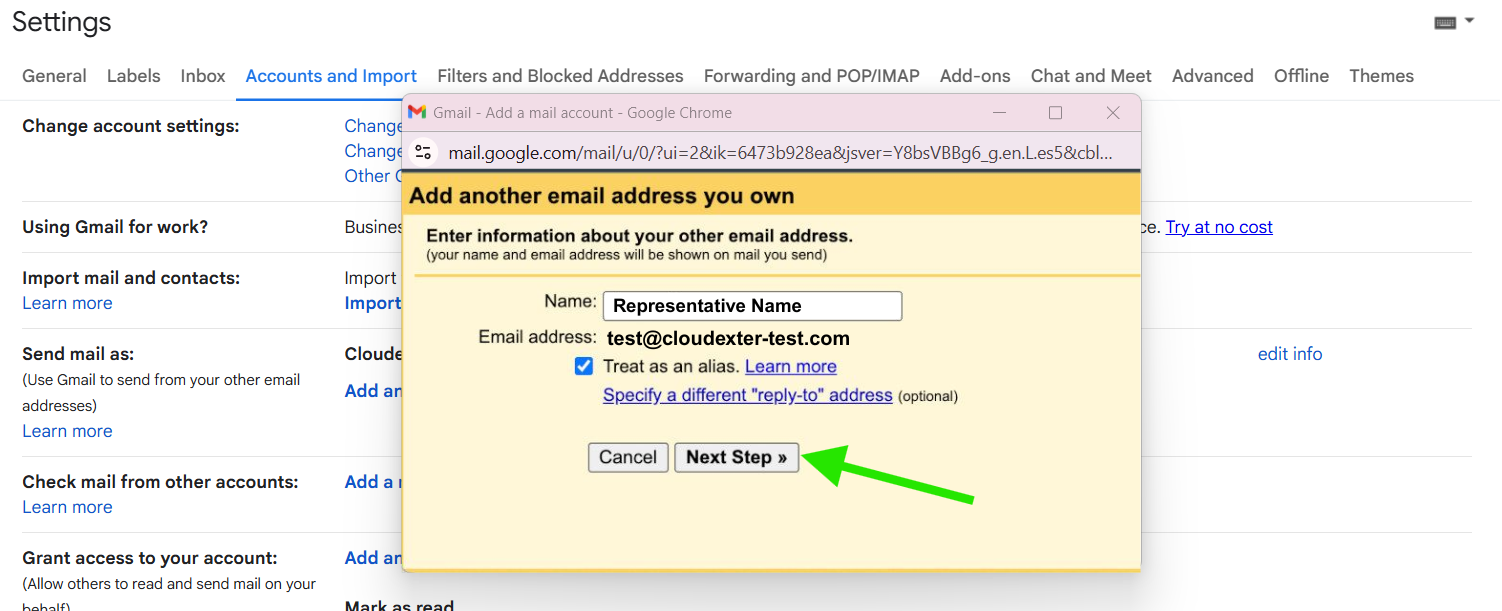
STEP 8: Click ‘Next Step’.
Section titled “STEP 8: Click ‘Next Step’.”You can set your email representative name and then click next step.
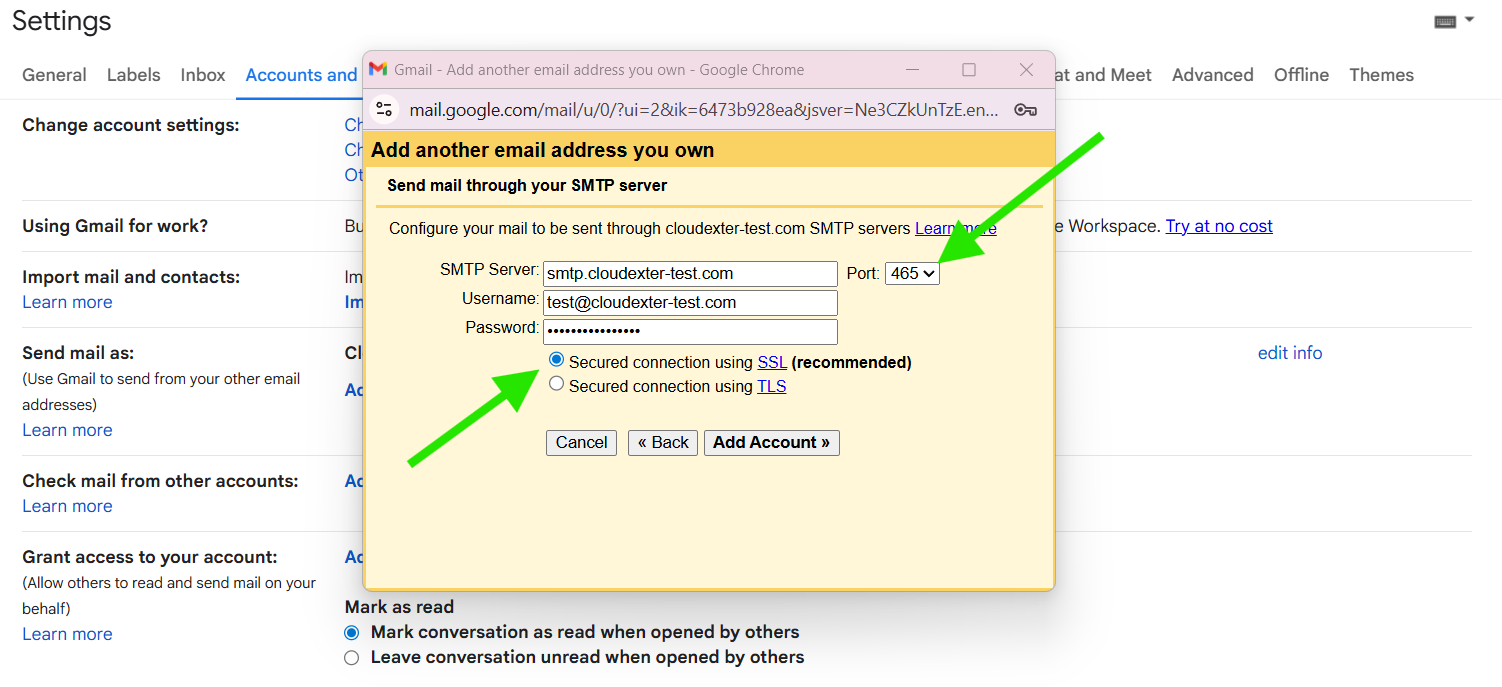
STEP 9: SMTP Server Configuration (Port 465 with SSL)
Section titled “STEP 9: SMTP Server Configuration (Port 465 with SSL)”Use mail.your-domain.com as the SMTP server, enter your full email address and password, select port 465, enable SSL for a secure connection, and click Add Account.
STEP 10: Verify your account
Section titled “STEP 10: Verify your account”You’re almost done! Gmail has added your mailbox and outgoing mail settings.
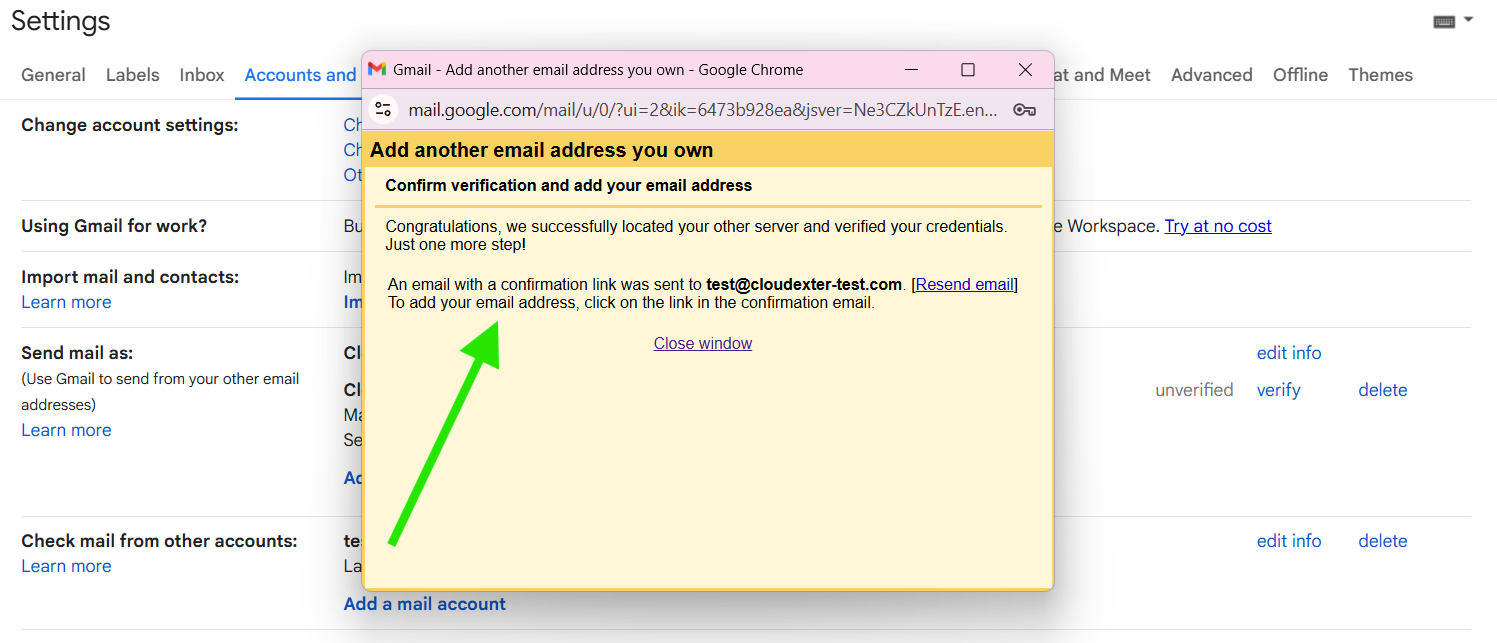
STEP 12: Click on Confirm.
Section titled “STEP 12: Click on Confirm.”Now you’ll need to verify the account before you can successfully send outbound emails from Gmail. Check your webmail! Once you verify the confirmation link, you will be able to access, send, and receive emails from your webmail directly through Gmail.